Projects so far

Showing posts with label carrier bags. Show all posts

Saturday, 12 March 2011

10th project completed - a scrap fabric and fused plastic brooch

 Well, another project completed. This week I was playing with plastic bags and some fabric scraps. I hope you will like this project, embellished with beads and basic hand stitches it is quite simple and relatively quick!


And here it is:


A fused plastic and fabric brooch


Materials needed:

  1. Some scraps of brightly coloured fabrics
  2. Some coloured plastic carrier bags
  3. 1 tube of multi purpose glue (UHU type)
  4. A small scrap of heavy card
  5. A brooch pin
  6. Bondaweb
  7. Heavy craft wire
  8. Beads
  9. Black Acrylic paint and a paint brush
  10. Two protective sheets of parchment / baking paper or Teflon sheets
  11. Iron and ironing surface
Instructions:


1. Cut enough squares of Bondaweb for the number of different fabrics / plastic bags you have and fuse one to the back of each scrap of fabric. Leave to one side.


2. Taking your carrier bags, cut a large square and fold it in half. In a well ventilated area place it between your two protective sheets and press on a medium heat. If you get any smoke or fumes you have the iron too hot! The bag should melt slightly and shrink, warp and fuse together.

3. Fuse some Bondaweb to the reverse of your fused plastic and leave to one side.


4. Choose a piece of fabric to be your background and place on one piece of protective sheet to protect your ironing surface. Remove the backing paper from the Bondaweb on one of your fused plastic pieces and place on top of your background. Cover with the other parchment / baking paper / Teflon sheet and fuse it to the background.
5. Now cut random shapes from your other scraps and place as desired removing the backing paper as you go. Once you are happy with the design, cover with your protective sheet and iron. All the layers should now be firmly attached.


6. Pick a small section of your created background that you particularly like and start to embellish with simple hand stitches. I used straight and blanket stitch. Couch down a bent wire shape and add some beads to add texture and interest.


7. Trim your piece of work down to an appealing shape for your brooch. Draw around your shape onto a piece of heavy card and cut it out.


8. Paint the back of the card shape - this will be the back of the brooch. Leave to Dry.
9. Once dry, glue your brooch back and front together and again leave to dry.
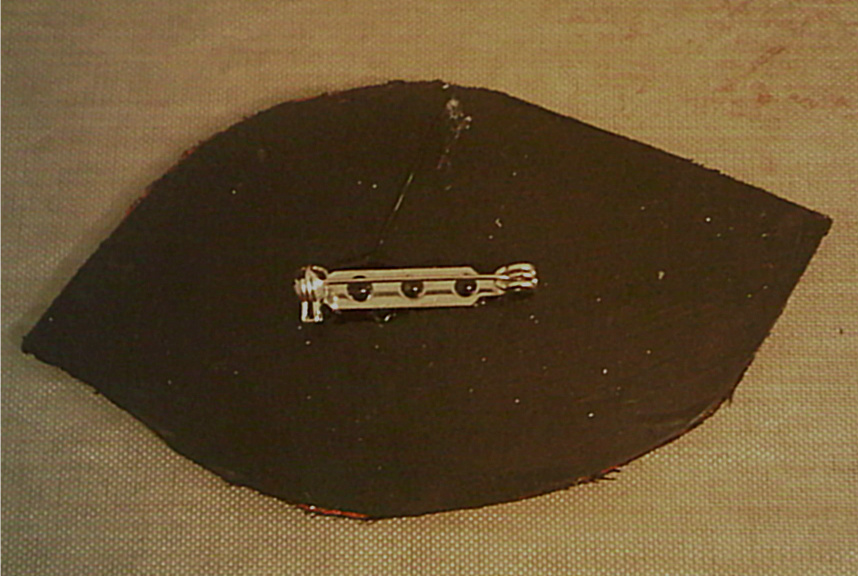

10. To finish glue the brooch pin to the back of your brooch.

Well there it is, project number 10. I will announce project 11's materials tomorrow evening as usual. See you then!


Saturday, 29 January 2011

4th Project complete!


Hi all,


Right I've just finished the forth project in my challenge, it is a set of four free machined 'scribble' coasters made out of bubblewrap and carrier bags! I hope you like them.


‘Scribble’ coasters


Materials needed:
1. Bubble wrap with large bubbles
2. Selection of colourful carrier bags
3. Thread
4. Sewing machine
5. Iron
6. Ironing board
7. Teflon sheets or baking parchment / Baking paper
8. Felt off cuts at least 10cm sq. each


Instructions:


To make the background


1. Lay a large piece of parchment paper down onto your ironing board and lay a
piece of bubblewrap over it with the bubbles facing upwards (1st picture above).
2. Lay pieces of carrier bag and some threads / fibres in a pleasing arrangement on
top of your bubblewrap layer.
3. Cover with another piece of bubblewrap with the bubbles facing downwards, and
place another piece of parchment paper over your bubblewrap ‘sandwich’.


4. Now iron all your layers until the plastics have fused together (see picture above)
You should now have something that looks a bit like this:


The next step is to start embroidering

1. Set your machine to darning or cover / lower the feed dogs of your machine
2. Put an embroidery / darning foot on your machine and set the machine to straight
stitch and off you go. Move the fabric around whilst stitching at a steady fast pace.
3. Go around all the coloured shapes a couple of times, then if you like fill in the
gaps with different patterns, just as you would when scribbling / doodling (see the
pictures below).


Once you are happy with your fabric you need to cut your coasters out, what

shape is up to you. I drew around an existing coaster but you could use anything
like a roll of Sellotape for example.

We now need to go back to the ironing board and make some backing to add
some weight.


1. This is done by folding a carrier bag into quarters and ironing it between the two
pieces of parchment paper until it fuses together you will probably need one bag
for each coaster.
2. Now put your coaster wrong side up onto the bottom sheet of parchment paper
and cover with your sheet of melted plastic bag and then the other piece of
parchment paper. Iron, turn over, then repeat the ironing on the other side.
3. Cut around the coaster.


You could leave it at this stage but I wanted to finish mine with a backing, so I
appliquéd each coaster to a piece of felt with a small satin stitch and then cut really
close to the stitching to finish.


And there we have it a useful set of coasters and a lot of fun with the machine! Right off to put the kettle on - anyone else for tea?